
The Angel Tree
/Follow along with Artist Amy Pearce Stone, of Her Art from the Attic, to learn some acrylic painting techniques to paint cherry blossoms.
After what feels like months of work, I've finished the painting. For an ungodly long time, I've been rolling title ideas around in my head. But then I thought, why not keep it simple? The Angel Tree, that's what I'll call it.
You might be wondering just how much I worked on it since my last post. Well, in three weeks I went from basic colours, to finished. My secret? Set everything else aside, play music that you like to sing along to (I’m partial to 80s classics), and paint!
The first step I took after finishing the ground area and the bushes was to work on the water. That took forever, and a lot of paint, to figure out. If you put tiny blobs of paint on the area where you want your water (colours to shade and highlight), in a minimum of one, maximum of three smoothing motions of your finger (you don’t want to mix the paint too much), you can create the effect of water. This takes a lot of practice—it took me several tries, about three hours, minus the drying time—so don’t get frustrated. Once the paint was almost dry, I took a pencil and used the tip to create ripples, then smoothed it again. For the final touch (after the paint was dry) I used diluted black paint to create the reflection of the tree trunks. As an extra tip, if you make a mistake with wet paint on top of dry paint, you can use a wet tissue to clear it off right away.

WATER AND ANGEL details

rock, boulder, and trunk details

lEAVES AND BRANCH DETAILS
For the rest of the details, like the angel’s wings and dress, and the tree leaves, I painted in the colours I wanted, let them dry, and then used the dry brushing technique to add even more details.
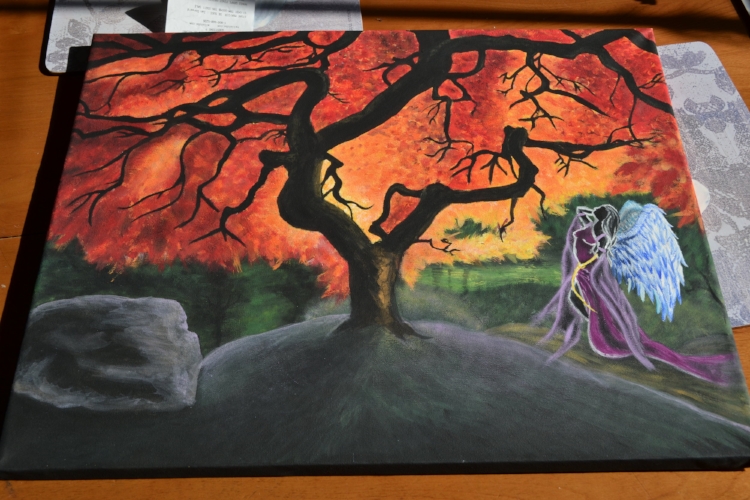
tHE ANGEL TREE
From the beginning, I’ve said I don’t like to paint. I think the reason is that I don’t like the idea of having to meet someone’s standards. My standard of "good enough" for myself is low and I’m always happy with the results. When I paint for someone else, I always tell myself “it needs more work.”
This is why it’s important for me to have a support system where I have someone to tell me to keep going and to share every step of progress I make. For that, I am grateful, and gleefully happy not to worry about working on it any longer.
Now, all I have to do is deliver the painting to its new home and owner. Goodbye is always hard, but in a way, it's also rewarding. Besides, I'll see it again.

Meaghan Côté
Meaghan Côté is a second-year student at Algonquin College in the Professional Writing program. Other than spending time with her cat, Buffy, she enjoys reading (all the time, anytime, everywhere and anywhere), creating art, reading, drinking tea, more reading, and writing! She also enjoys cooking, although the results aren't always edible.
Facebook | Sites I follow: Craftsy | Bananajamana